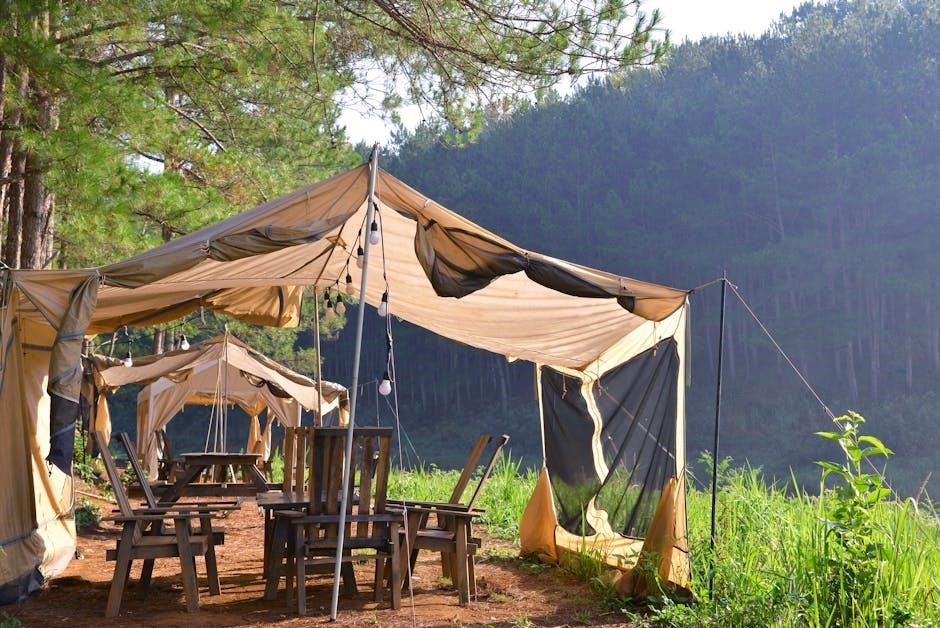
The 10×30 canopy party tent is a durable‚ versatile shelter ideal for events‚ offering ample space and easy assembly. Its sturdy frame and waterproof canopy ensure reliability.
1.1 Overview of the Tent’s Features and Benefits
The 10×30 canopy party tent features a sturdy powder-coated steel frame‚ durable polyethylene fabric‚ and removable sidewalls for versatility. It provides 300 square feet of shelter‚ ideal for events. The frame is easy to assemble with clips or straps for securing the canopy. Its design maximizes interior space‚ while the removable walls offer flexibility for customization. This tent is perfect for outdoor gatherings‚ ensuring durability and weather protection.
1.2 Importance of Proper Assembly and Safety Precautions
Proper assembly ensures structural integrity and safety. Always follow instructions‚ inspect for damages‚ and use correct fastening techniques. Avoid over-tightening to prevent fabric tears. Check weather forecasts and secure the tent with stakes or weights. Never leave the tent unattended in bad weather or overnight. Keep flammable materials away‚ as the canopy is not fireproof. Ensure a stable setup to prevent accidents.

Unpacking and Preparing the Tent Components
Begin by carefully unpacking all components‚ including the frame‚ canopy‚ stakes‚ and instructions. Identify and organize each part to ensure all items are present and undamaged;
2.1 Identifying and Organizing the Frame and Canopy Parts
Carefully unpack and identify all frame components‚ including legs‚ rafters‚ and connectors. Organize parts by type and label them for easy access. Lay out the canopy separately‚ ensuring it’s undamaged and free of wrinkles. Use the provided parts list and diagrams to verify each item is present and properly categorized. This step ensures a smooth and efficient assembly process.
2.2 Checking for Completeness and Damages
Inspect all components for completeness and damages. Verify the presence of stakes‚ ropes‚ and connectors. Ensure no parts are bent‚ rusted‚ or broken. Check the canopy for tears‚ holes‚ or fading. If any items are missing or damaged‚ assembly may be unstable or unsafe. Consult the manual for replacement options before proceeding with setup.

Assembling the Frame
Begin by laying out the frame components on a level surface. Align the legs‚ rafters‚ and connectors according to the manual. Secure all connections firmly to ensure stability.
3.1 Laying Out the Main Frame Components
Start by unpacking and identifying all frame parts. Place the legs‚ rafters‚ and connectors on a flat‚ open area‚ aligning them according to the manufacturer’s diagram. Ensure each piece is positioned correctly‚ noting any labels or markings for proper orientation. Double-check that all components are present and undamaged before proceeding. This step ensures a smooth assembly process.
3.2 Connecting the Rafters and Crown Connectors
Start by attaching the hip rafters to the 3-way crown connectors‚ ensuring a snug fit for structural integrity. Repeat this process for each crown connector‚ securing the appropriate number of rafters. Next‚ connect the regular rafters to the crowns and hip rafters‚ forming the tent’s rectangular shape. Align rafters carefully to maintain the frame’s geometry and use pins or fasteners securely. Proper connections are key for stability.
3.3 Integrating the Top Spreaders and Additional Rafters
Attach the top spreaders to their designated points on the frame‚ ensuring secure connections to prevent sagging. Next‚ integrate any additional rafters for extra support‚ aligning them carefully to maintain the tent’s shape. Follow the manufacturer’s instructions for specific fasteners or locking mechanisms. Double-check all connections to ensure stability and even weight distribution. Proper integration ensures a sturdy and reliable structure.

Attaching the Canopy
Attach the canopy by aligning it with the frame and securing it using clips‚ straps‚ or Velcro. Ensure a taut‚ wrinkle-free fit for optimal stability and weather protection.
4.1 Aligning the Canopy with the Frame
To align the canopy with the frame‚ start by laying the fabric on the ground‚ right-side up. Ensure all edges align with the frame’s perimeter. Attach one corner securely‚ then work around the tent‚ maintaining even tension. Proper alignment prevents wrinkles and ensures a snug fit‚ crucial for stability and weather resistance. Use clips‚ straps‚ or Velcro as specified.
4.2 Securing the Canopy Using Clips‚ Straps‚ or Velcro
Attach the canopy to the frame using clips‚ straps‚ or Velcro‚ starting at one corner. Pull straps taut‚ avoiding over-tightening‚ and secure with buckles. Clips snap into place‚ ensuring even spacing‚ while Velcro offers a quick‚ alignment-friendly option. Properly securing the canopy ensures a snug‚ wrinkle-free fit and optimal stability‚ protecting against wind and weather. Regularly inspect attachments for tightness.
4.4 Ensuring a Taut and Wrinkle-Free Canopy
After attaching the canopy‚ check for wrinkles or sagging areas. Adjust straps or clips to redistribute tension evenly‚ ensuring a smooth surface. Avoid over-tightening to prevent fabric damage. Gently smooth out wrinkles by hand or reposition the canopy as needed. Proper tension enhances the tent’s stability and appearance‚ ensuring optimal performance and weather resistance.
Securing the Tent
Use stakes or weights for stability‚ ensuring the tent is firmly anchored. Check ground conditions and wind forecasts to determine the best securing method for safety.
5.1 Using Stakes for Stability
Secure the tent using sturdy stakes suitable for the ground type. Drive them into the ground at an angle‚ ensuring firm embedding. Space stakes evenly around the perimeter‚ focusing on corners and exposed areas for maximum stability. For added support‚ use guy lines attached to the tent’s corners and sides. This ensures the structure remains stable‚ especially in windy conditions.
5.2 Employing Weights for Additional Support
For added stability‚ use weights like sandbags or water-filled containers at the tent’s corners and sides. Position them to counteract wind forces‚ ensuring the tent remains anchored. The weight amount depends on wind conditions and the tent’s size. Place weights evenly and check the forecast to prepare for potential gusts. This method is ideal for hard surfaces where staking isn’t feasible.
5.3 Reinforcing the Structure for Windy Conditions
For windy conditions‚ use guy lines or ropes to provide extra support. Attach these lines to the tent’s corners and sides‚ securing them to nearby stable objects. Ensure the tent is tightly anchored to the ground with additional stakes or weights. Check all connections for tightness and consider the ground type for optimal stability. Regularly inspect the structure to withstand strong winds effectively.
Final Checks and Adjustments
Inspect the canopy for tension and wrinkles‚ ensuring all connections are secure. Smooth out any uneven areas and test the tent’s stability by gently tugging on it.
6.1 Inspecting the Canopy for Tension and Evenness
Carefully examine the canopy for uniform tension and evenness. Check for any sagging or wrinkles. Adjust straps or clips to ensure a smooth‚ wrinkle-free surface. Secure all edges tightly to prevent wind damage. Verify that the fabric is evenly distributed and taut‚ providing optimal protection and a polished appearance. Proper tension enhances stability and extends the tent’s lifespan.
6.2 Ensuring All Connections Are Secure
Inspect every connection point‚ including frame joints‚ rafters‚ and canopy attachments. Verify that all pins‚ bolts‚ and clips are firmly in place. Double-check that Velcro or straps are securely fastened. Ensure no components are loose‚ as this could compromise stability. Use tools like a wrench if necessary to tighten any precarious connections. A secure setup guarantees structural integrity and safety during use.
6.3 Testing the Tent’s Stability
Gently tug on the frame and canopy to ensure all connections are secure. Check for any swaying or wobbling‚ which could indicate instability. Walk around the tent‚ applying moderate pressure to corners and the center to test sturdiness. Ensure the tent is evenly balanced and level. This step confirms the structure can withstand normal weather conditions and remains safe for use.
Troubleshooting Common Issues
Identify common problems like frame misalignment or uneven canopy tension. Check connections‚ ensure proper alignment‚ and tighten loose parts. Adjust straps or clips to resolve wrinkles or sagging. Patience and thorough inspection are key to resolving issues quickly and ensuring a stable setup.
7.1 Addressing Frame Connection Difficulties
If frame components are difficult to connect‚ ensure all parts are properly aligned and pins or connectors are securely fastened. Straighten any bent pieces gently. Check for damage or mislabeling in the parts list. Apply a small amount of lubricant if necessary. If a part is damaged‚ replace it with a spare. Double-check the manual for correct orientation and assembly sequence.
7.2 Resolving Uneven Canopy Tension
If the canopy has uneven tension‚ inspect for loose or over-tightened connections. Adjust straps or clips to redistribute tension evenly‚ starting from the center and working outward. Ensure all attachment points are securely fastened. Gently pull slack areas to eliminate wrinkles. Avoid over-tightening‚ as it may damage the fabric. If issues persist‚ reposition the canopy and recheck alignment. Proper tension ensures stability and longevity.
7.3 Handling Structural Instability
If the tent shows signs of instability‚ inspect the frame connections and ensure all parts are securely fastened. Check for loose joints or misaligned components. Tighten any bolts or clips‚ and verify that stakes are deeply anchored. In windy conditions‚ use additional guy lines or weights for support. If instability persists‚ consider disassembling and reassembling the tent to ensure proper alignment. Always monitor weather conditions and take preventive measures to maintain stability.
Maintenance and Storage
Regularly clean the tent fabric and frame. Ensure it’s completely dry before storing in a cool‚ dry place to prevent mold. Use a storage bag for organization.
8.1 Cleaning and Drying the Tent
Regularly clean the tent by brushing off dirt and debris. Use a mild soap solution to wipe down the fabric and frame‚ avoiding harsh chemicals. Rinse thoroughly and allow the tent to dry completely in a well-ventilated area to prevent mold or mildew. Ensure all parts are dry before storing to maintain quality and longevity.
8.2 Properly Storing the Tent and Its Components
Store the tent in a dry‚ cool place‚ away from direct sunlight and moisture. Disassemble all parts and clean them before storage. Use the provided storage bag or a sturdy container to protect the tent and its components. Label the storage container for easy identification. Avoid folding the canopy; instead‚ roll it neatly to prevent creases and damage. Ensure all hardware is securely packed separately.
Safety Tips and Weather Considerations
Ensure safety by avoiding fire hazards‚ securing the tent in windy conditions‚ and preparing for bad weather to prevent damage and ensure a stable setup always.
9.1 Avoiding Fire Hazards
The 10×30 canopy party tent is made of polyethylene fabric‚ which is not fireproof. Keep it away from open flames‚ grills‚ or sparks. Never leave the tent unattended near fire sources‚ and ensure all heaters or cooking equipment are placed at a safe distance. Proper precautions will help prevent fires and ensure a safe event environment for everyone.

9.2 Preparing for Bad Weather
Always check the weather forecast before setting up your 10×30 canopy party tent. Use guy lines and additional stakes to secure the tent in windy conditions. Ensure the tent is firmly anchored to the ground‚ and consider using weights for extra stability. Avoid setting up the tent in strong winds or during storms to prevent damage. Regularly inspect the tent’s stability during bad weather.
9.3 Monitoring Wind Conditions
Monitor wind conditions closely when setting up your 10×30 canopy party tent. Use guy lines and additional stakes to secure the tent in windy conditions. Ensure the tent is firmly anchored to the ground‚ and consider using weights for extra stability. Avoid setting up the tent in strong winds or during storms to prevent damage. Regularly inspect the tent’s stability during bad weather.
The 10×30 canopy party tent offers durability and ease of assembly‚ making it ideal for events. Follow instructions for optimal setup and enjoy a sturdy‚ versatile shelter.
10.1 Summary of Key Assembly Steps
Start by unpacking and organizing all components. Assemble the frame on a level surface‚ ensuring proper alignment. Attach the canopy using clips‚ straps‚ or Velcro‚ maintaining even tension. Secure the tent with stakes or weights for stability. Check and tighten all connections‚ then inspect the canopy for wrinkles or sagging. Ensure the structure is stable and ready for use by performing a final inspection.
10.2 Final Tips for a Successful Setup
Ensure a clean‚ dry workspace for assembly; Use ground stakes or weights to secure the tent. Check weather conditions and reinforce the structure in windy environments. Regularly inspect the canopy for damage and clean it before storage. Follow the provided instructions carefully and seek help if needed. Proper setup ensures a safe and enjoyable event under your 10×30 canopy party tent. Always follow safety guidelines.